Happy March to all of our potters, readers, and community members, and welcome to another edition of the Warwick Pottery Newsletter! We enter this month of anticipation for the Spring blooms and good vibes!
In our March newsletter, we’re sharing a huge collection of glaze tests, providing some website updates, and featuring a new Student Spotlight! Keep reading to see what’s been happening at Warwick Pottery this month.
With love,
Marilyn
What’s Happening at Warwick Pottery
NEW: WEBSITE UPDATE – Video Resource Page!
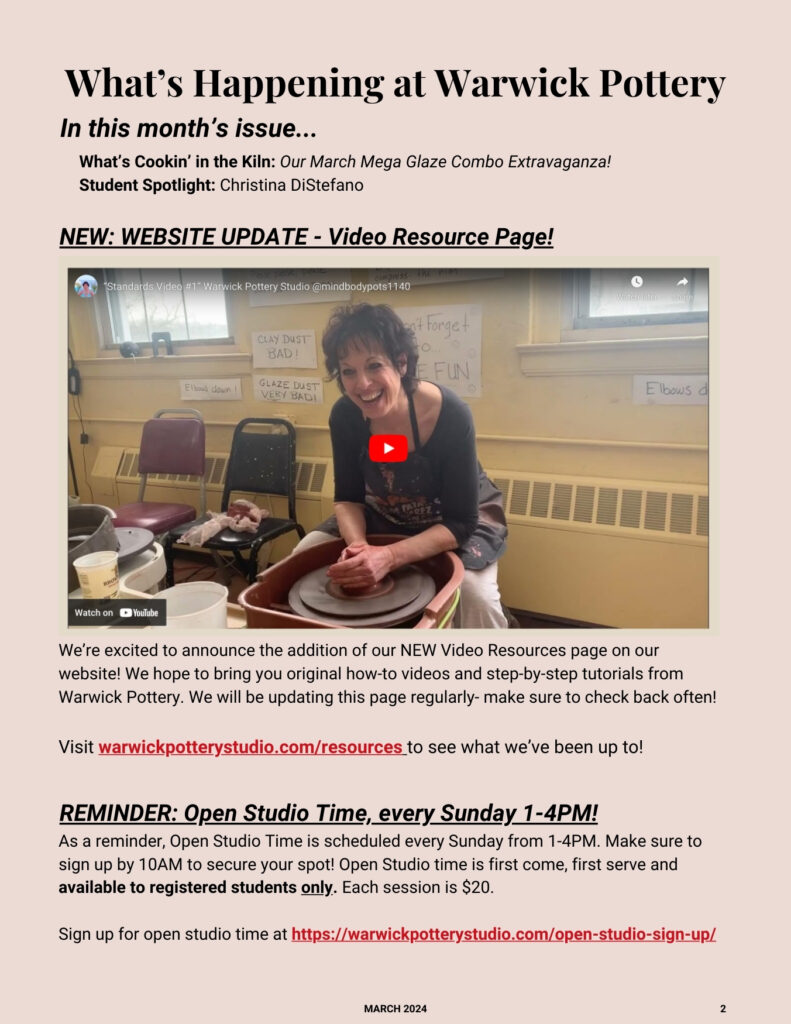
We’re excited to announce the addition of our NEW Video Resources page on our website! We hope to bring you original how-to videos and step-by-step tutorials from Warwick Pottery. We will be updating this page regularly- make sure to check back often!
Visit our Resources page to see what we’ve been up to!
REMINDER: Open Studio Time, every Sunday 1-4PM!
As a reminder, Open Studio Time is scheduled every Sunday from 1-4PM. Make sure to sign up by 10AM to secure your spot! Open Studio time is first come, first serve and available to registered students only. Each session is $20.
Click here to sign up for Open Studio time.
What’s Cookin’ in the Kiln
Our March Mega Glaze Combo Extravaganza!
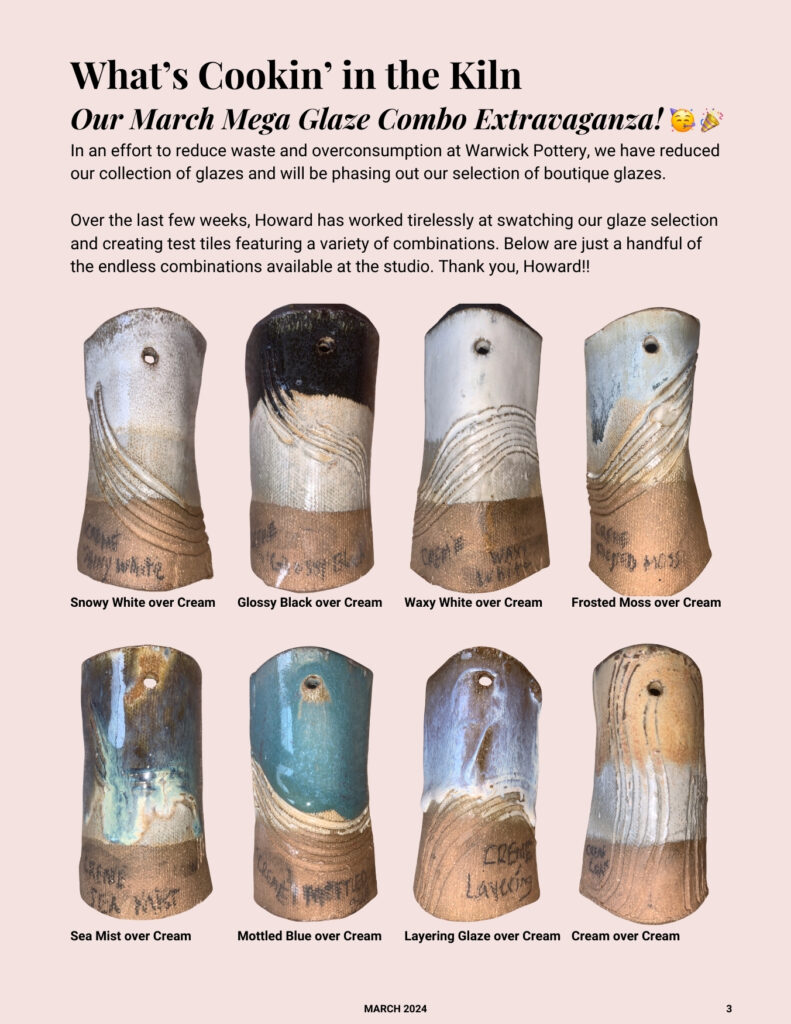
To reduce waste and overconsumption at Warwick Pottery, we have reduced our collection of glazes and will be phasing out our selection of boutique glazes. We will be switching over to offering glazes by Standard Clay, click here to view the collection of mid-fire glazes available from Standard Clay.
Over the last few weeks, Howard has worked tirelessly at swatching our glaze selection and creating test tiles featuring a variety of combinations. Below are just a handful of the endless combinations available at the studio. Thank you, Howard!!
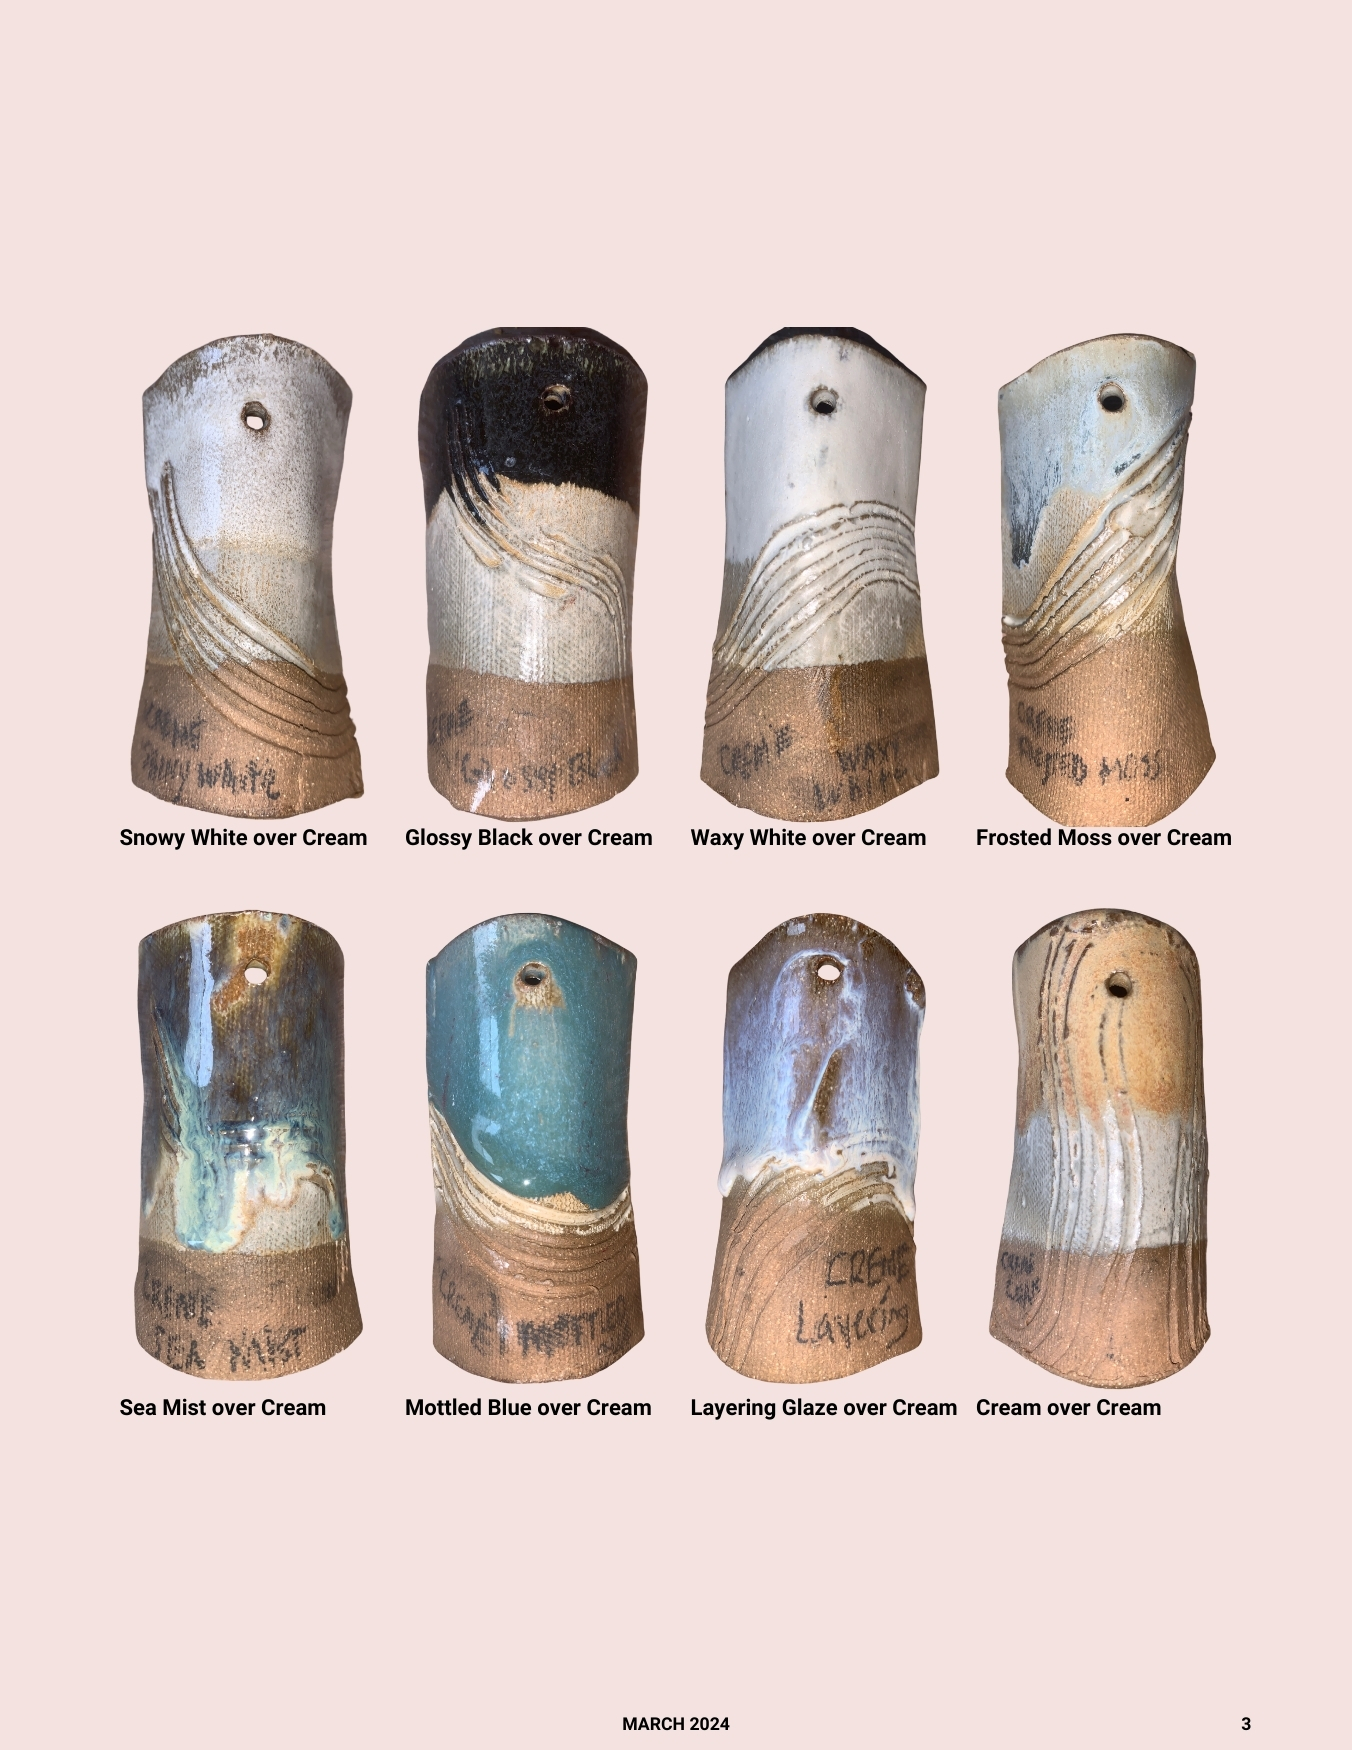
From left to right, top to bottom:
Snowy White over Cream
Glossy Black over Cream
Waxy White over Cream
Frosted Moss over Cream
Sea Mist over Cream
Mottled Blue over Cream
Layering Glaze over Cream
Cream over Cream
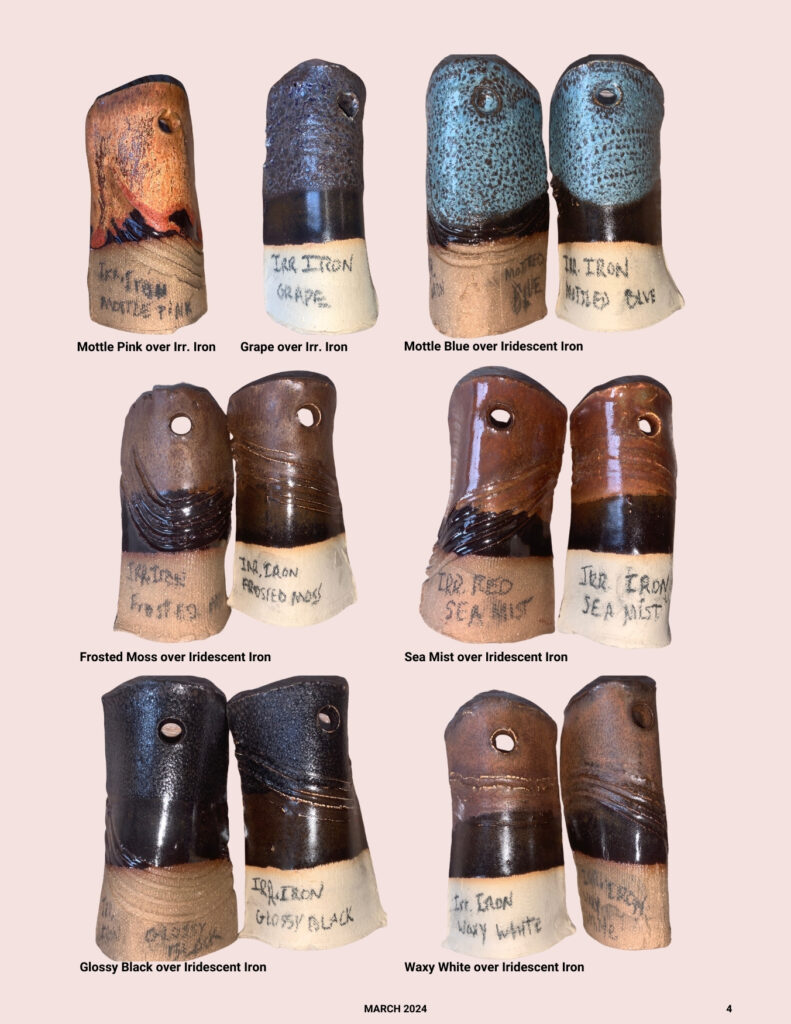
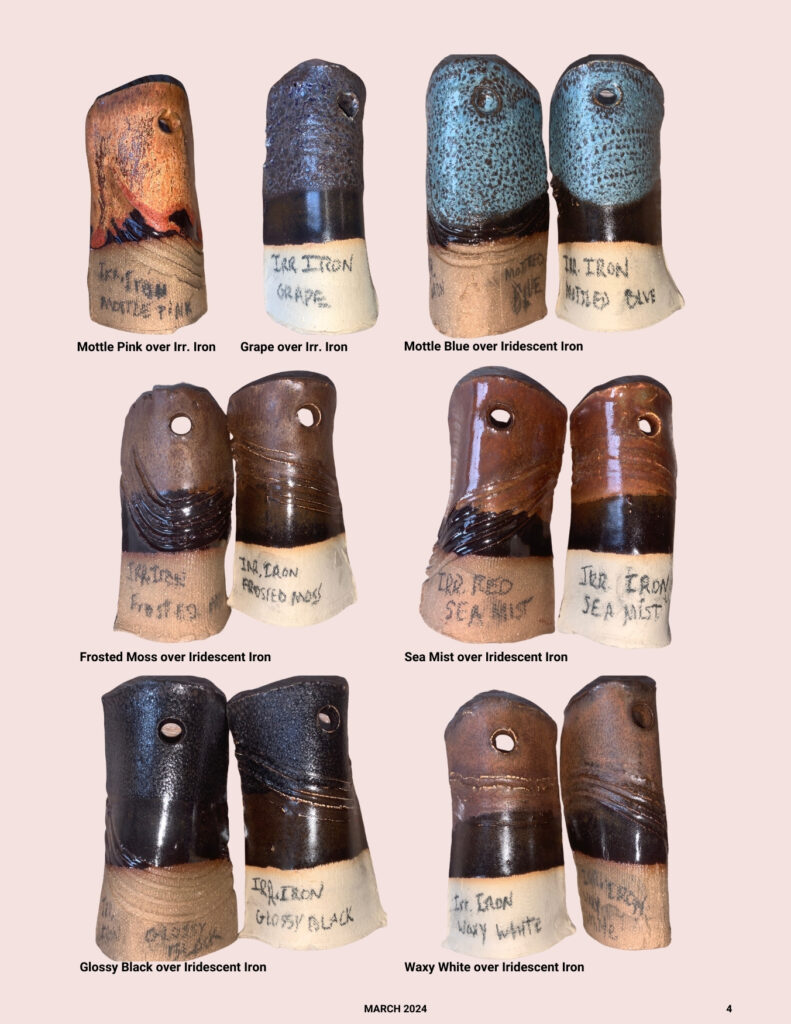
From left to right, top to bottom:
Mottled Pink over Iridescent Iron
Grape over Iridescent Iron
Mottled Blue over Iridescent Iron
Frosted Moss over Iridescent Iron
Sea Mist over Iridescent Iron
Glossy Black over Iridescent Iron
Waxy White over Iridescent Iron

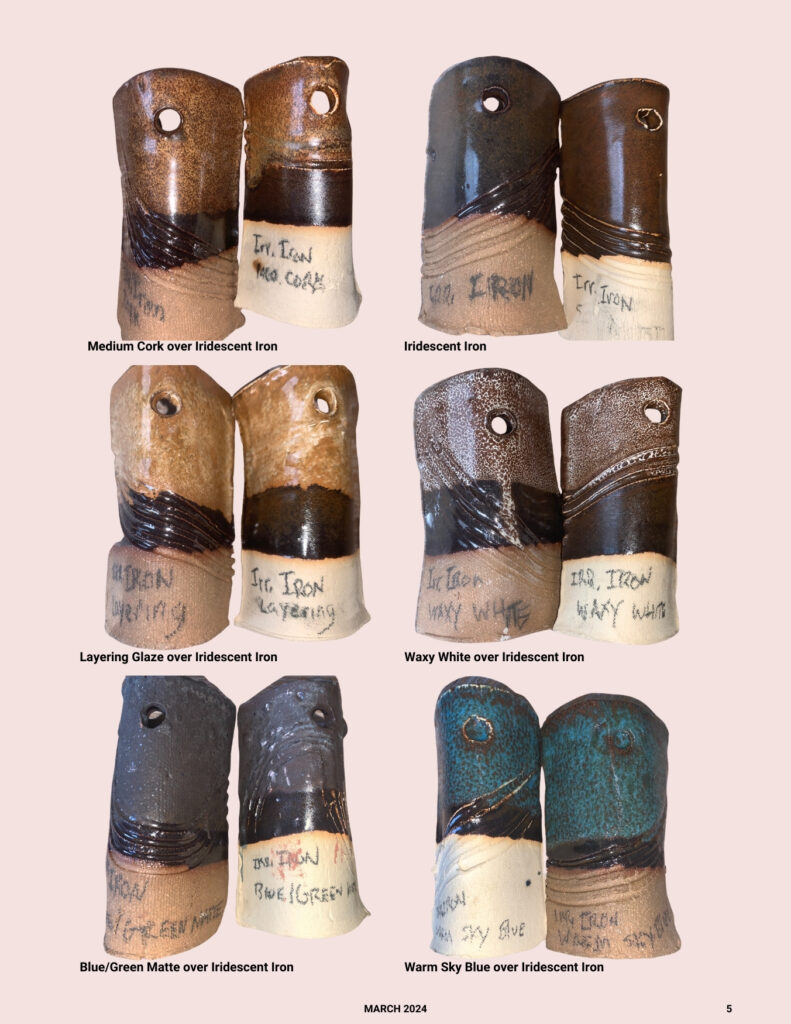
From left to right, top to bottom:
Medium Cork over Iridescent Iron
Iridescent Iron
Layering Glaze over Iridescent Iron
Waxy White over Iridescent Iron
Blue/Green Matte over Iridescent Iron
Warm Sky Blue over Iridescent Iron

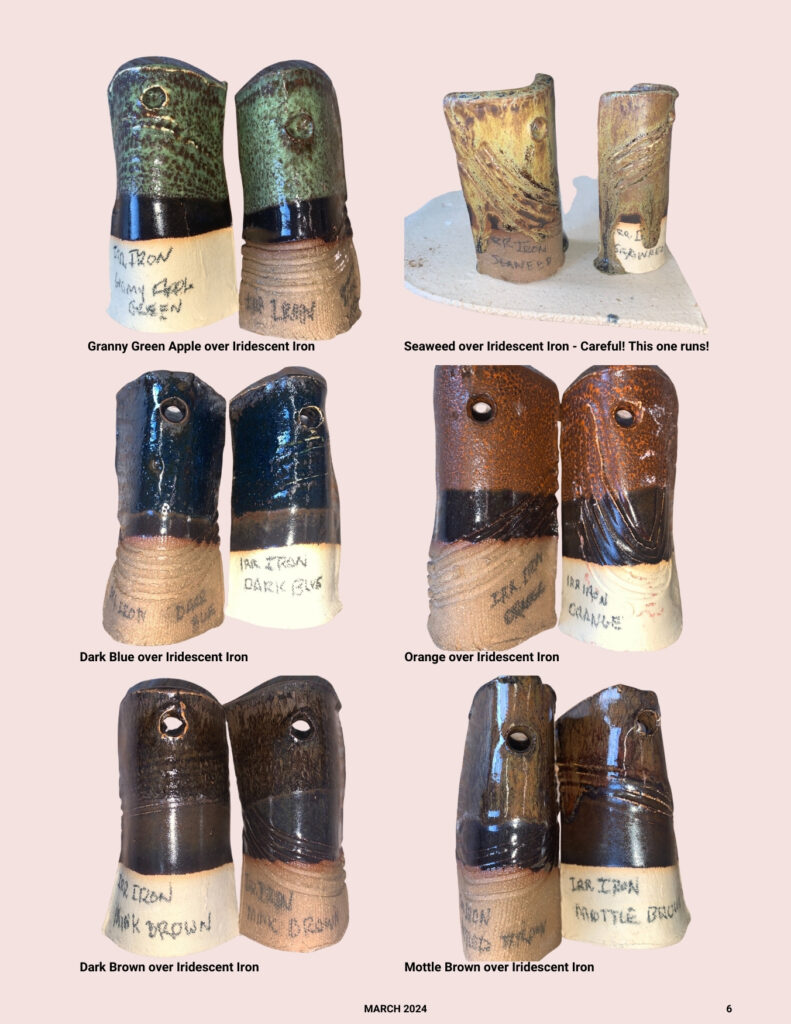
From left to right, top to bottom:
Granny Green Apple over Iridescent Iron
Seaweed over Iridescent Iron – Careful! This one runs!
Dark Blue over Iridescent Iron
Orange over Iridescent Iron
Dark Brown over Iridescent Iron
Mottled Brown over Iridescent Iron
Student Spotlight: Introducing… Christina DiStefano
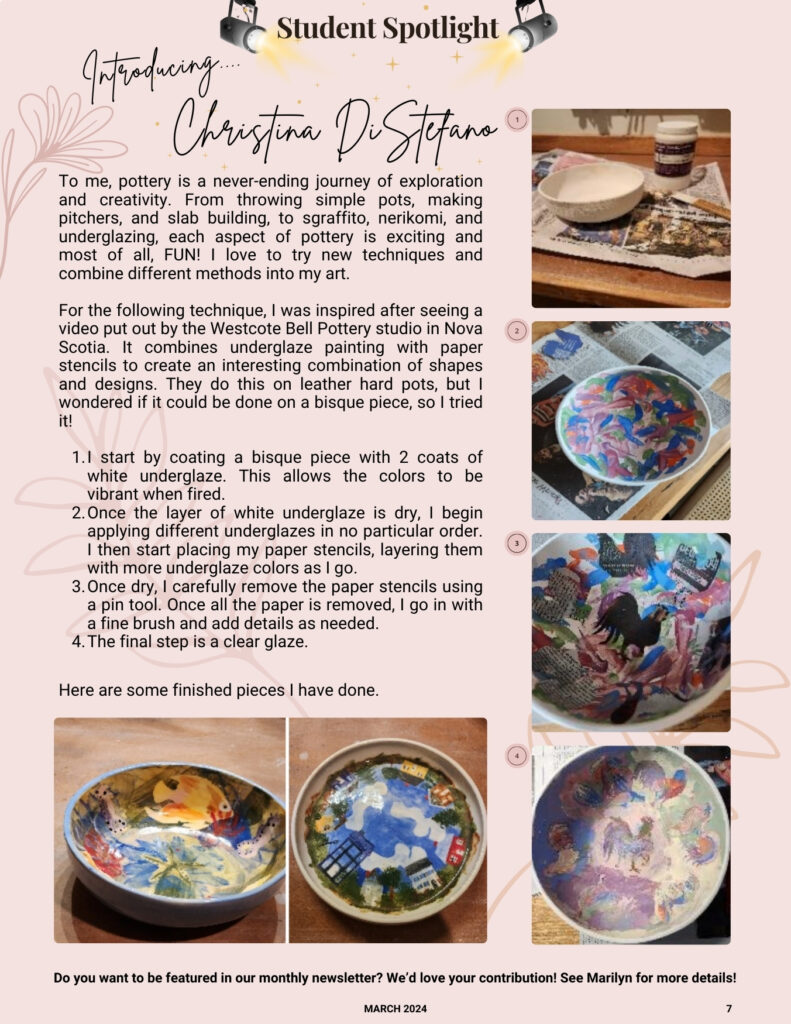
To me, pottery is a never-ending journey of exploration and creativity. From throwing simple pots, making pitchers, and slab building, to sgraffito, nerikomi, and underglazing, each aspect of pottery is exciting and most of all, FUN! I love to try new techniques and combine different methods into my art.
For the following technique, I was inspired after seeing a video put out by the Westcote Bell Pottery studio in Nova Scotia. It combines underglaze painting with paper stencils to create an interesting combination of shapes and designs. They do this on leather hard pots, but I wondered if it could be done on a bisque piece, so I tried it!
1. I start by coating a bisque piece with 2 coats of white underglaze. This allows the colors to be vibrant when fired.
2. Once the layer of white underglaze is dry, I begin applying different underglazes in no particular order. I then start placing my paper stencils, layering them with more underglaze colors as I go.
3. Once dry, I carefully remove the paper stencils using a pin tool. Once all the paper is removed, I go in with a fine brush and add details as needed.
4. The final step is a clear glaze.